Know How to Migrate Maildir to Zarafa Email Client Successfully


Maildir is another type of format for storing emails on the Unix platforms. Traditionally, those emails folders were saved as a plain text file which is called MBOX file format. Maildir file format is supported by various email application like Mozilla Thunderbird. But as the number of email applications increasing day by day, the need of users are also varying and they start migrating. One such type of query is how to migrate Maildir to Zarafa. As Zarafa has multiple advanced functions which are not present in Maildir supporting email client.
Zarafa is used for email management on the Linux platform. It is a web-based email client which has multiple utilities like emails, contacts, calendars, task manager etc. It has also the features of video conferencing, audio conferencing, chat and presentation sharing with friends. These superior features of Zarafa attract users to convert Maildir files to Zarafa. But, directly it is not possible and to know about the same continue the article below.
How to Export Maildir to Zarafa Manually?
It is not possible to perform migration directly. There are three steps to carry out the entire task as explained below:
- Convert Maildir to PST
2. Configure Zarafa id in Outlook
3. Import PST into Outlook
Step: 1 Migrate Maildir to PST
There is no manual process available to convert Maildir into Outlook compatible file format. So that, users can prefer the third-party solution which named as Maildir Converter tool. This software is used to export single or multiple Maildir files. By using this utility, attachments are also exported along with the Maildir files. It has date filter option to filter Maildir message and naming convention option to save output files.
Step 2: Configure Zarafa ID in Outlook
One needs to configure their Zarafa id into the Outlook. Without configuration, it is not possible to open or import migrated PST into Outlook. To configure Zarafa in Outlook manually, one must have a computer with MS Windows in which Outlook and Zarafa Windows client has been installed. Also, he or she must have the name or IP address of the server and their username and password. Now, there are following steps to be followed to configure Zarafa in Outlook.
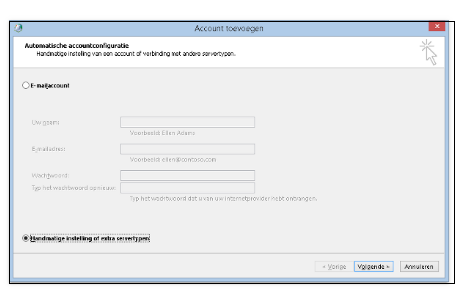
- Create a Profile
→ First, go to the Control panel then click on E-mail
→ Now, click on view profile then click on add button
→ After that, enter a profile name and click OK
→ Select manually configure server settings
→ Then, click on next
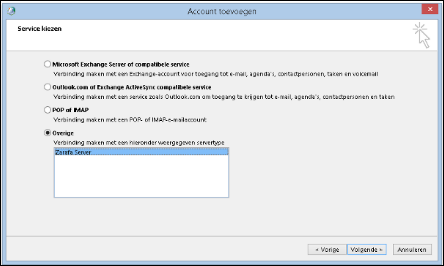
- Add a New Account
→ Select Other option
→ Then, choose Zarafa server
→ After that, click on next
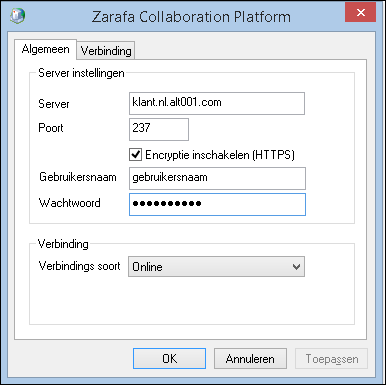
- Zarafa General Settings
→ Enter the name or IP address of the server
→ Then, enter your username and password
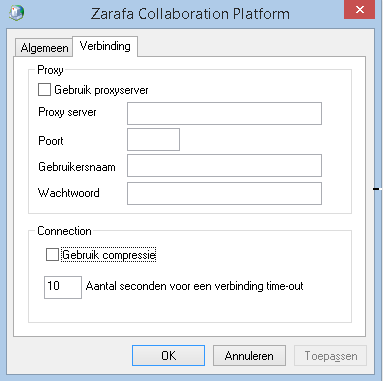
- Zarafa Connection Settings
→ Now, choose tab connection
→ Then, uncheck use compression
- Add the Email Id
→ Click on OK button
- Configuration Completed
→ Click on Finish
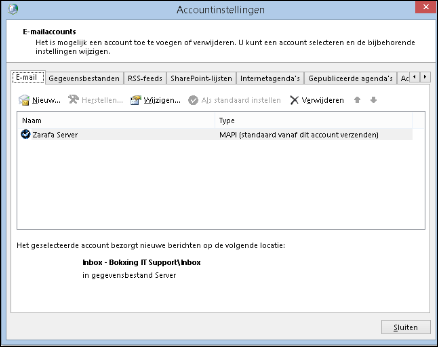
- Make Default Account
→ Now, Zarafa is configured to be the default account. If there are more than one accounts in this profile then choose the Zarafa server and click on “set as default”
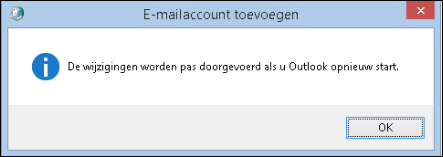
→ Finally, start the Outlook.
Step 3: Import PST into Outlook
After performing two steps a user has migrated PST file and Zarafa account configured in Outlook. But, this migrated PST file is orphan. To complete the process to convert Maildir to Zarafa, the user has to import migrated PST file into Microsoft Outlook. To import PST, it is necessary to install Outlook in the system and perform these steps:
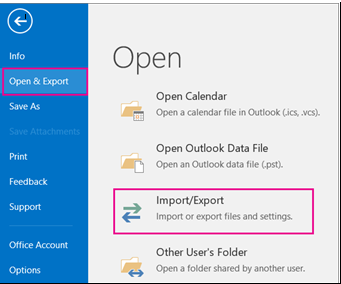
→ First of all, select the File from the top of Outlook ribbon

→ Now, select Open & Export then select Import/Export
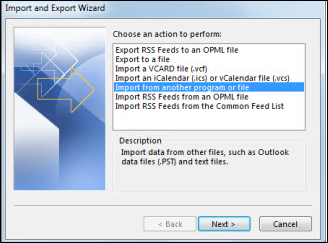
→ After that, select Import from another program or file & click on Next
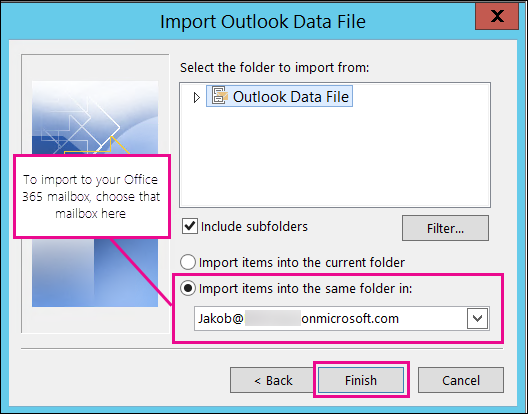
→ In next, select Outlook Data File and click on Next button

→ Browse the PST file that you need to import. Then, choose how you want to deal with email and contact from the Options. Click on Next button
→ At last, click on Finish button.
Concluding Words
As it is discussed, Zarafa has various advance functions which are not in Maildir. So users want to export Maildir to Zarafa. But, Maildir is not manually converted into Zarafa. Therefore, three steps mentioned above. A user can follow them to migrate Maildir files to Zarafa email client in an efficient manner.