Discover Knowledge on How to Use Data Loss Prevention in Office 365


Several security private and government agents provide suggestions that people must take protective measures to stop dangerous threats. Rather than focusing on security threats, things go deeper at the time of implementing them. Things go more into how to control and protect data while accessing an application, generally cloud-based. In today’s agenda, data leakage is one of the biggest fears among the enterprises. The planned organization’s data is out in the wild, which is well enough for companies to keep stringent and controlling the mechanisms in place. Know why Data Loss Prevention in Office 365 is important.
It is mandatory to limit down the data flow and access when one is using cloud services for their business. Microsoft Office 365 renders its users with an additional security service of DLP that keeps a look at the secretive or essential data of the firm. It works on the basic rules and regulations, which are specified by the super administrator. Data loss prevention in Office 365 prevents data breaching issues, which involves files related to financial things or any other things, as well. By applying DLP in MS Office 365, users will be able to identify, track, and protect their confidential data across the cloud.
Working of Data Loss Prevention in Office 365
Activating DLP feature in Microsoft Office 365 detects the sensitive files by using the technique of deep content analysis. Without affecting the ongoing work of users, the sensitive data is identified for prevention purpose. Once decided, the person can apply DLP policies on the content sources like:
- Microsoft Office 365
- OneDrive for Business
- SharePoint Online Sites
- MS Office 2016 desktop applications
The policies will start enforcing the defined operations when they get completely synchronized in the respective apps. The working of data loss prevention in Office 365 is based on two parameters i.e., location where it is applied and conditions when its execution and respective actions are to be performed.
What Is Involved in Sensitive Files?
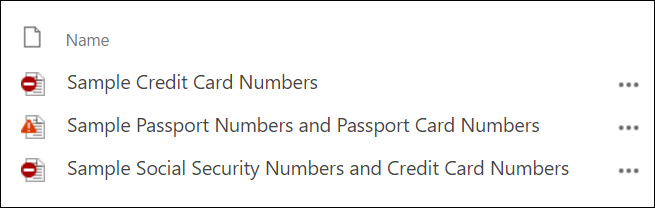
Till this point, again and again in each sentence, we are reading a term ‘sensitive files/ data/information’. Now a question arises that what actually these are? Well, the Exchange Online offers a definition of this sensitive data. This definition is dependent upon the countries to which the end user belongs. Remember one thing that this information can be any like bank account numbers, credit card numbers, passport numbers, etc. The type of sensitive items could be a keyword, pattern matches, regular expression, or internal function. This will be helpful in achieving highest accuracy degree that reduces the total number of false positives. DLP in MS Office 365 enables users to detect different content types within an individual policy.
Procedure to Create Data Loss Prevention in Office 365
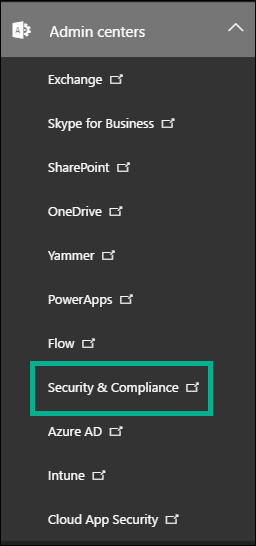
1. Login to the administrative account of Exchange online and click on Admin Centers. From the listed options, select Security and Compliance
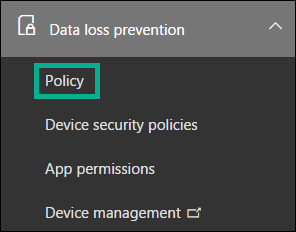
2. A new center page gets opened in which you have to expand Data Loss Prevention option and choose Policy from it
3. Choose the Create a Policy button through which a wizard gets opened on RHS where you have set properties for new policy. Select the industrial region whose regulations are to be enforced in your account
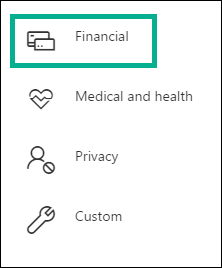
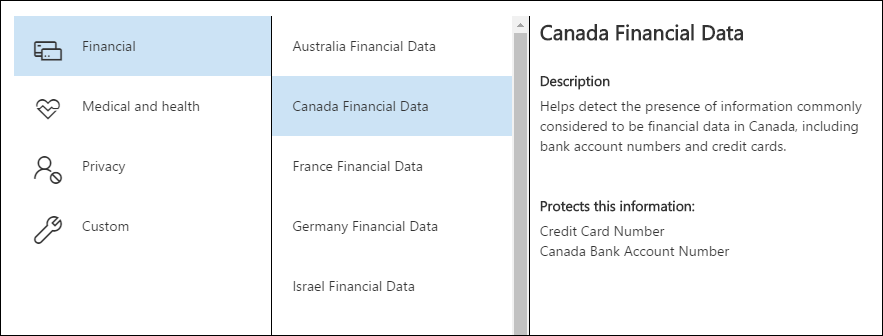
4. Hitting the mouse on Financial option will load all the countries list. You have to select anyone, as per the preference
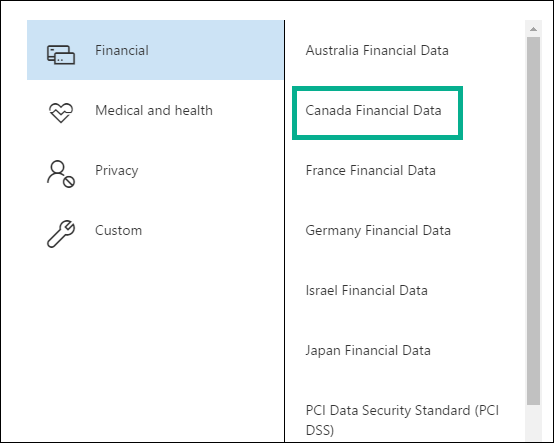
5. One click on any country will show a little bit description of the rule and information about the data type, which it will be protecting
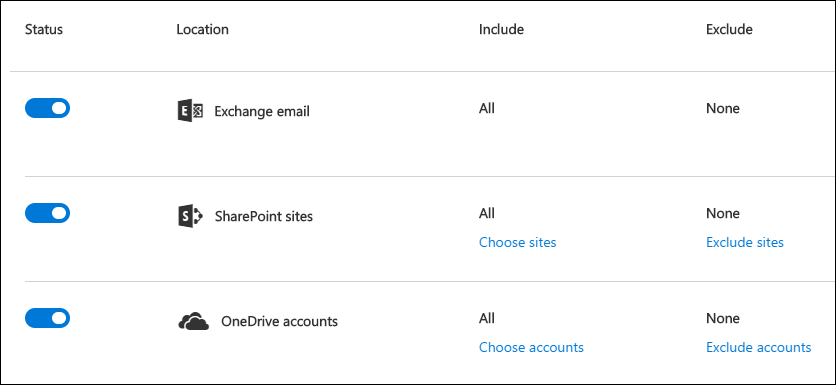
6. After this selection procedure, click on Next button. Mention the policy name with a short description for the same and again, click on Next. Either select All location or apply DLP in MS Office 365 at particular locations. It is totally your choice what you want in between Exchange email, OneDrive accounts, and SharePoint sites. If your choice is SharePoint and OneDrive sites then, feel free to choose accounts or sites by excluding the unwanted ones.
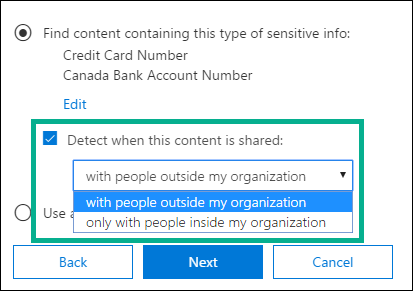
7. Click Next and either choose simple or advanced settings for further security purpose. It gets easy to create maximum DLP policies types in simple settings because no rules creation is required here. It covers almost all the common scenarios for protection purpose. Still, you can customize these settings by going for Advanced option
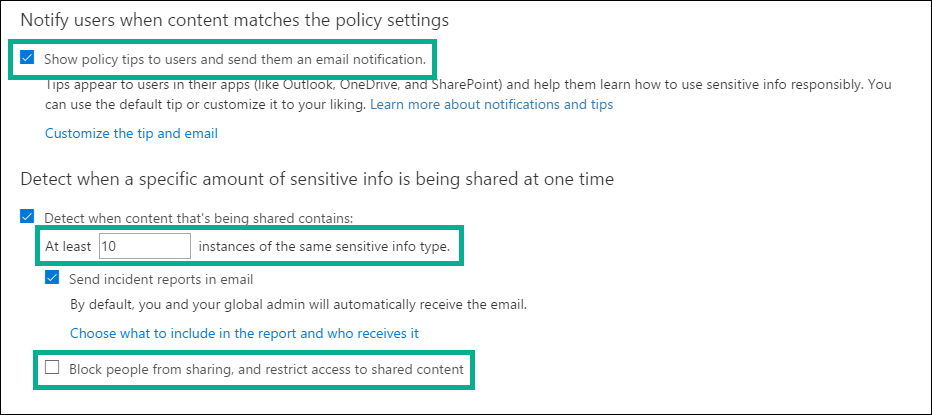
8. Press the Next button where you have to define the policy tips for end users. Now, set an alert for total times the confidential information is being shared with identical content. At this stage, you have to choose whether to block people for sharing files or not
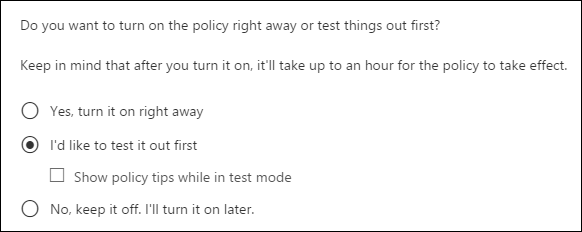
9. Finally, activate the rule for testing purpose and show or hide policy tips, or just disable it for all
Tips For Advanced Settings on Data Loss Prevention in Office 365
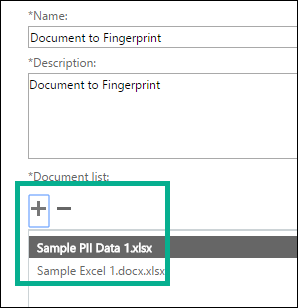
By default, the type of sensitive information does not cover all data of the organization. In the Exchange Online account, users can protect their particular files (on demand) with help of advanced settings. These settings are going to be performed by Security & Compliance center.
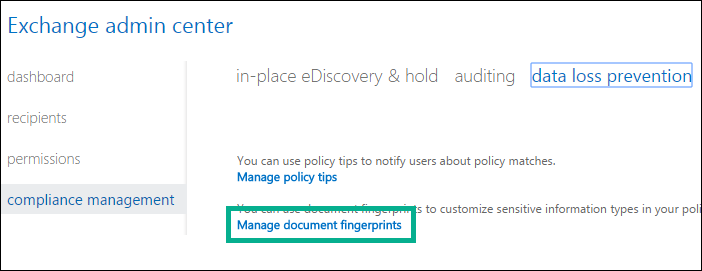
Click on the Management document fingerprint link to launch a panel where you have to provide a name and attach the file to be secured. This will create a new information within the DLP of MS Office 365 account
Experience of Users After Applying Data Loss Protection in Office 365
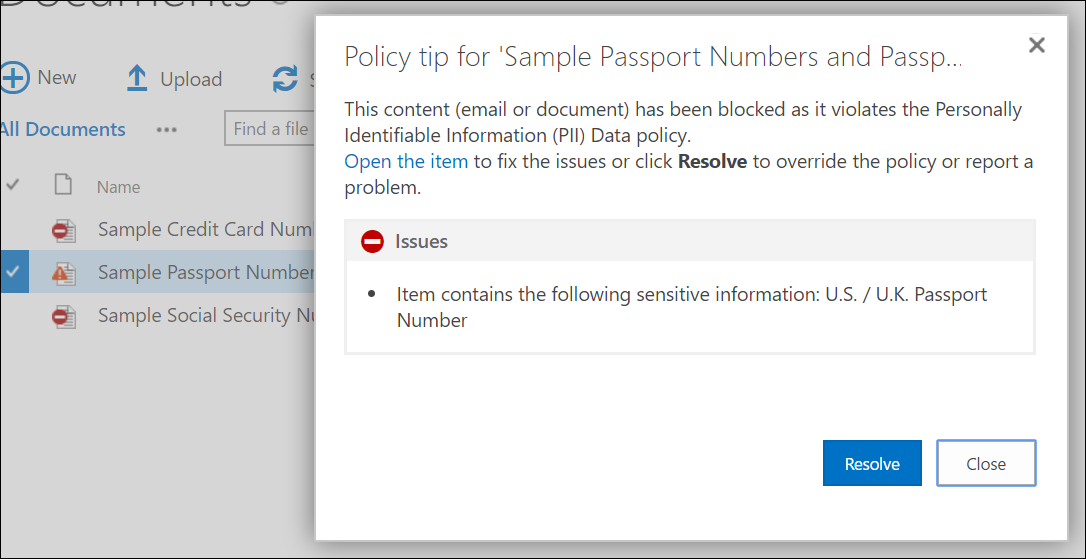
When you are completely done with creation of DLP policies in Microsoft Office 365 account, it starts inspecting your content. If any of the content in SharePoint or OneDrive matches the defined policy then, it gets marked both with the icon and changes. If enabled then, it will also be showing policy tips.
The items hover panel will be displaying policy and if it is blocked then, will be indicated here itself.

Whenever the account user clicks on View Policy tip, he/she will be able to learn details of the policy tip. He or she can read this tip and resolve the problem by following the security guidelines. Troubleshooting the problem will override the recent file violation and mark the content normally.
This is going to be useful when users want to get notification when they are going against the rules.
Conclusion
Data loss prevention in Office 365 is one of the best practice, which each and every individual should have in their account. It is very much risky to carry out a business on cloud when there is no security on cloud-based account. So, take help this blog and acquire idea that how to create DLP in MS Office 365. This will help in protecting sensitive information from data breach or leakage.