Enable and Manage Multifactor Authentication Via Microsoft Office 365


MS Office 365 offers support for MFA (Multifactor Authentication), which natively achieve the features of Azure AD. Different Microsoft clients seek a solution to enable and manage Multifactor Authentication in Office 365 but, they get solution to setup it in Exchange Online tenant. Therefore, here we came with this informative page that is going to describe only the method to enable and manage Multifactor authentication using Office 365 Admin Center.
A Quick Glance on O365 Multifactor Authentication
It is a method of authentication, which demands the use of several verification methods and enforces an extra cloud data security layer. Administrators are free to impose more than two verification methods, listed on the MFA page. By default, this option is disabled in Microsoft Office 365 but, interested clients can activate it for their purpose. It helps in safeguarding access to information and apps while keeping the work simplicity remain intact. A strong authentication method can be delivered by Office 365 licensed users if they try to take the best out of O365 MFA in a clever and intelligent manner.
Note – The core implementation point is to establish the procedures and processes to enable feature on the existing as well as newly engaged users. Prior to rolling out MFA to users in large scale, test and validate all the possible scenarios.
Enable Multifactor Authentication in Office 365
There exist three procedures to enable Multifactor Authentication in Exchange Online:
- Using Office 365 Admin Center
- Microsoft Azure Active Directory
- Execution of PowerShell commands
In this particular post, we are going to explain procedure using Office 365 Admin Center. It is a quite easy and simple method that we found till today’s date. Well, let’s begin with the steps to enable Multifactor Authentication via Microsoft 365 admin center.
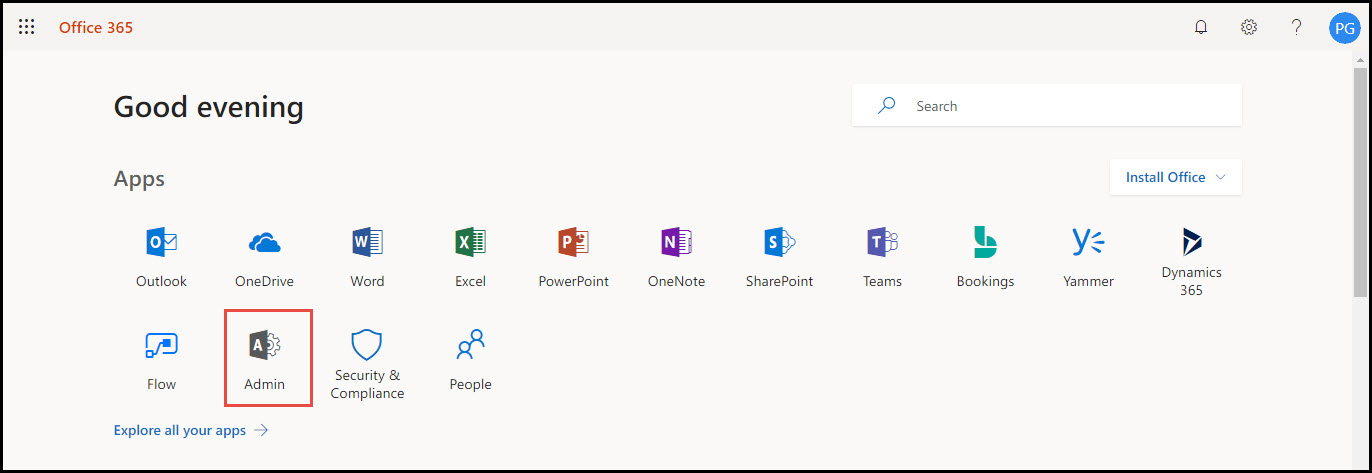
a) Login into your Office 365 online tenant and click on Admin to open the EAC page
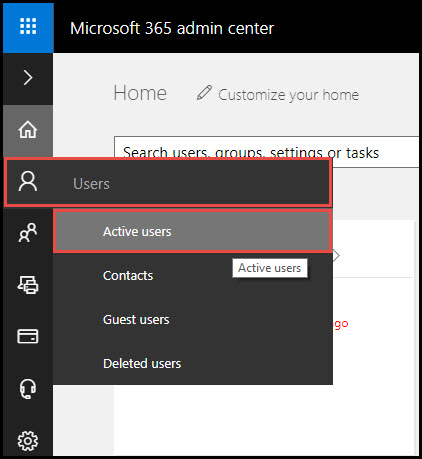
b) Click on the icon of Users and then choose the option of Active Users
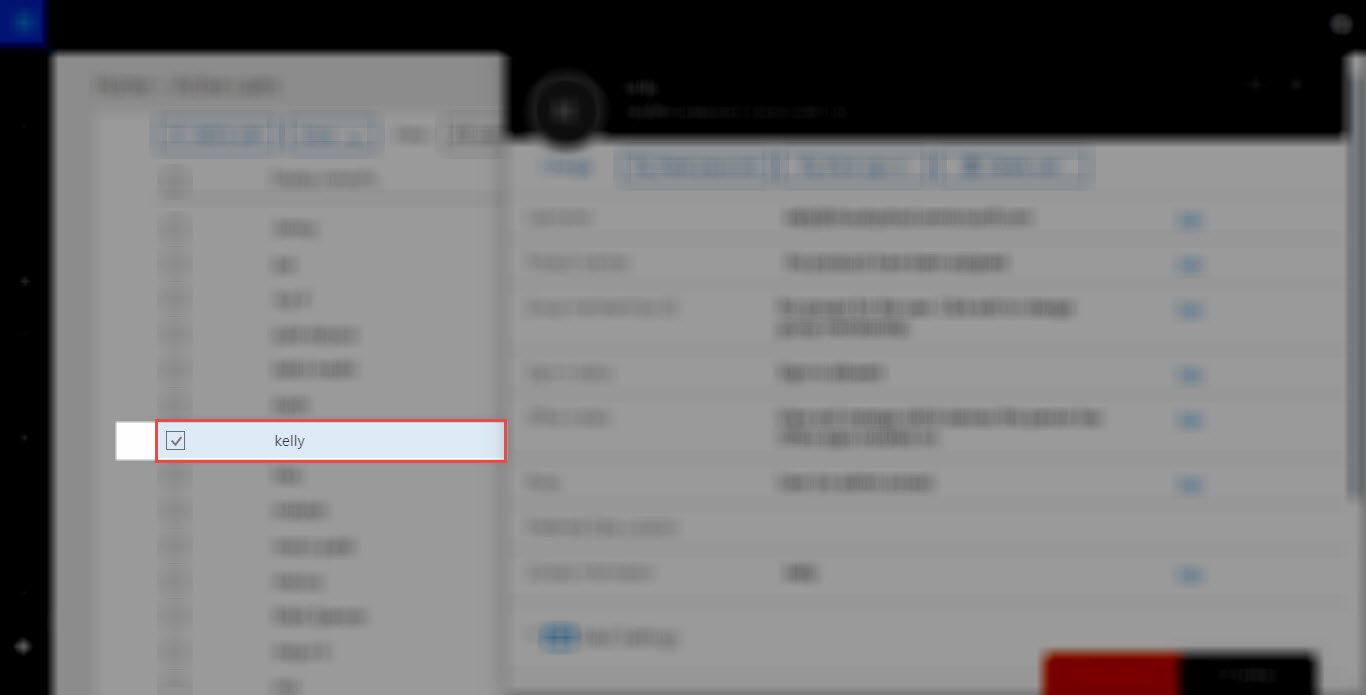
c) A list of ‘Active Users’ appear in which you have to select only one of your desired users at one time. You have to make selection by enabling checkbox of that user
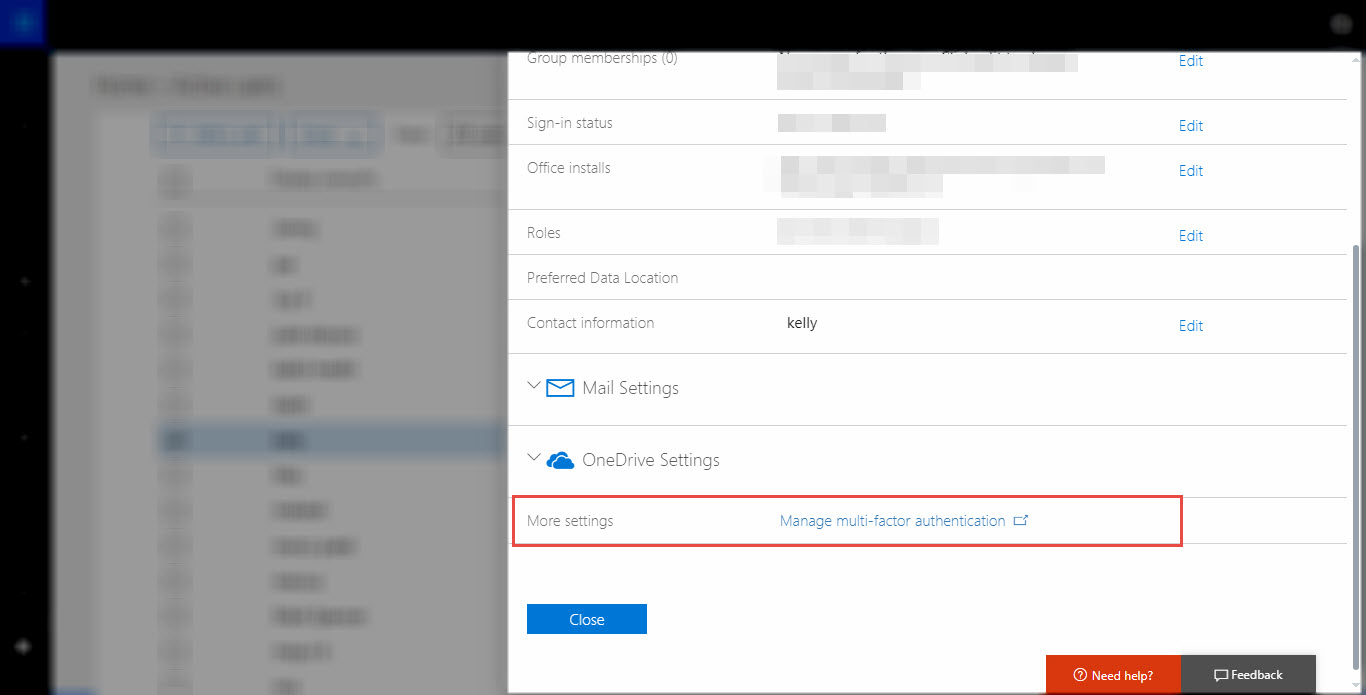
d) Now you’ll observe that just after checking the checkbox, a side window appears. In this side window, click on Manage multi-factor authentication link that you will find after scrolling down the side page
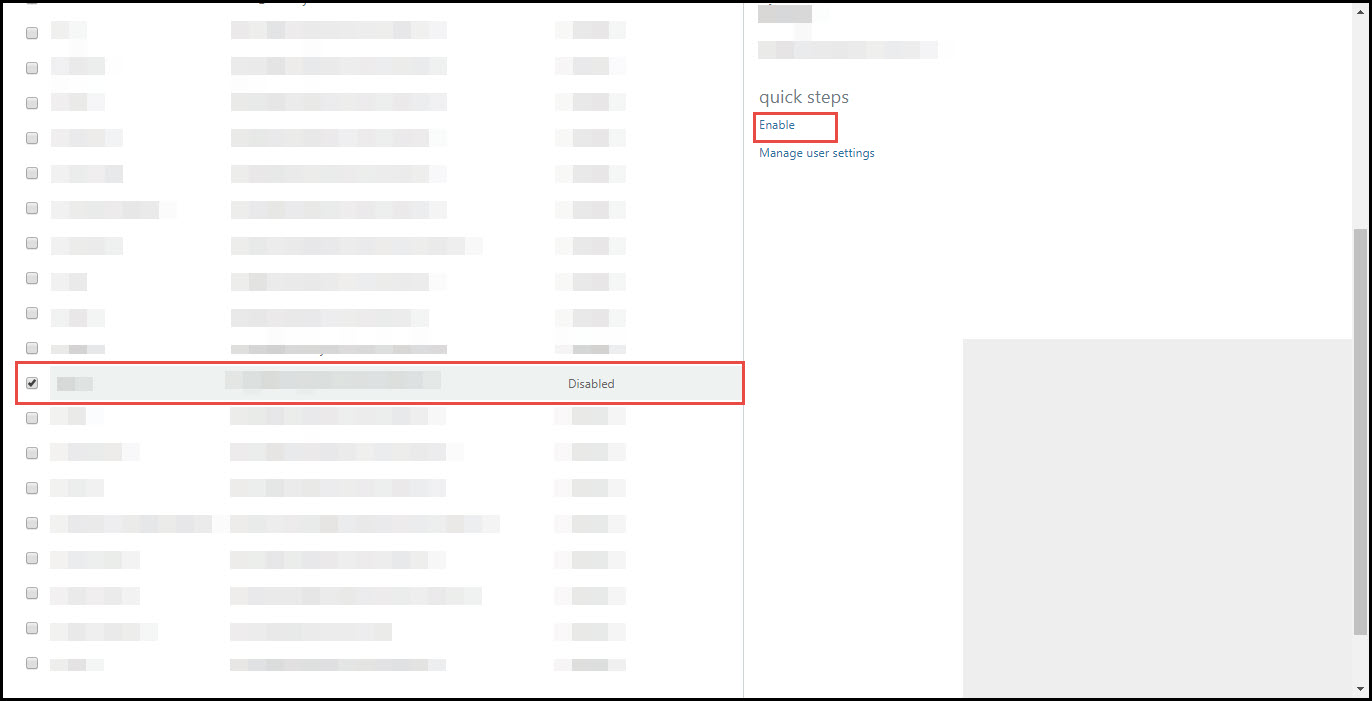
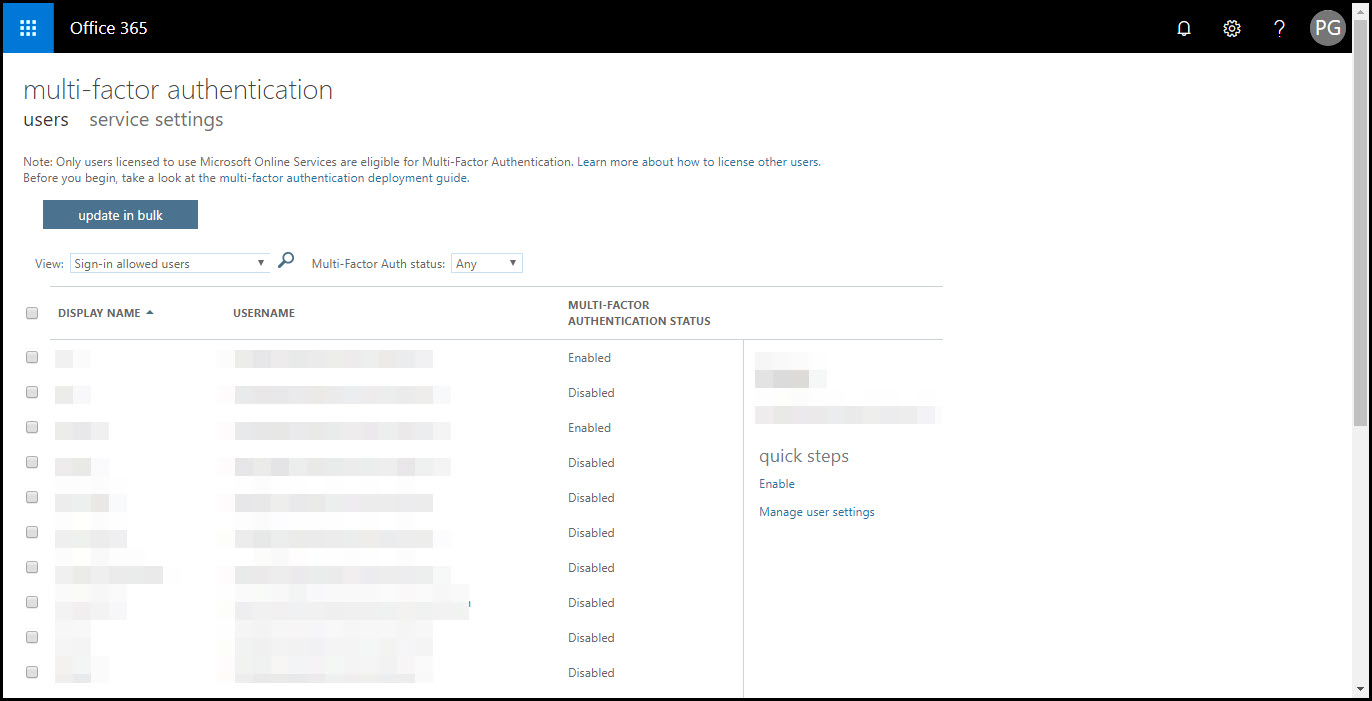
e) This opens a new tab on the same web browser. A list of all existent users with their current status of Multifactor Authentication appears. Again, check the checkbox of anyone desired user for selection purpose
f) Just after clicking on the checkbox you’ll observe that on the right-hand side of the screen a Quick Steps section appears. In this section, you have to click on Enable
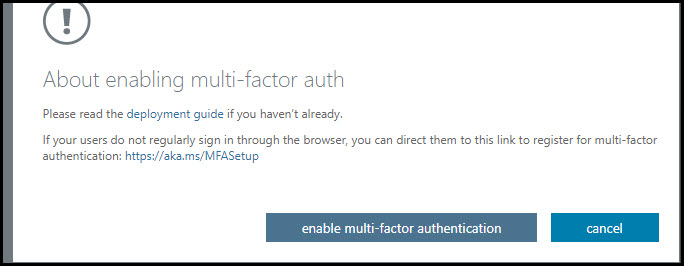
g) A warning dialog box appears where you have read each and every instruction carefully. If you are okay with instructions, click on Enable multi-factor authentication option
h) Finally, a process completion dialog box appears through which you will get result of the enforced policy. If all things go well, the expected outcome is ‘Updates Successful’. Click on Close button for finishing up with the entire operation
Manage Multifactor Authentication In Office 365 Admin Center
Although it is possible to configure individual settings associated with MFA per user but, the experts suggestion is to stay consistent and use similar set of settings for all users. Only make differences between the settings when it is essential. Well, when you desire to configure MFA global settings, take reference from following steps:
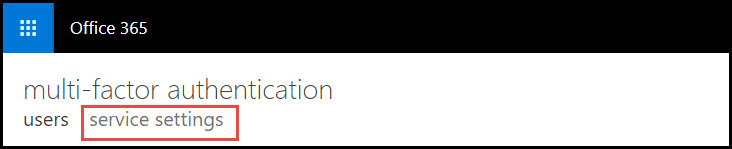
(1) Open the Multifactor Authentication page via Microsoft 365 Admin Center. If not known, take reference from above section – Step (a) to (d)
(2) Once done with Step (1), click on Service Settings tab
(3) Now here, first you have to decide whether you want to define app password for cloud data security purpose or not. If yes, activate the radio button of ‘Allow users to…..’; else ‘Do not allow…..’
(4) Choose the verification methods that will be available for users at the time of service configuration. Call to phone, test message to phone, Notification via mobile apps, and verification code service – These four options are available in this method.
(5) Now define the number of days for which you want to enable users to authenticate without reauthentication (the procedure of using Multifactor authentication on earlier authentic device)
(6) Once done with updates, click on Save to reflect the changes in accounts
That’s All For Today
Using PowerShell commands to enable and manage Multifactor authentication can be a complicated task. Therefore, the simplest method is to make use of Microsoft 365 Admin Center for making desired changes. Microsoft Office 365 licensed users are extremely suggested to make use of this feature and add an extra security layer in their account. At the end of the day, it is going to strengthen the overall Office 365 Cloud Security and that too without any extra tool.