How to Backup & Restore Cloud Data?
In this article, we will demonstrate techniques to backup & restore cloud data of popular business platform such as Microsoft 365 and Google Workspace. Here, you will learn why backup and restore is required and how companies can benefit from it. So, read the methods carefully and perform the backup of your cloud data and restore it whenever needed.
Benefits of Backup & Restore of Cloud Data
- Backup cloud data and save storage space
- Protects sensitive data from loss
- Easy to share data with other
Manual Technique to Backup Cloud Data & Restore It
In the case of Office 365 Cloud, there is no direct way provided by Microsoft to backup user account data. The backup can only be made by configuring Office 365 account in MS Outlook and using it Export option to download data locally. And, restore process can also be done using the Import feature of the MS Outlook application.
However, for Google Workspace, a single user account backup is easy to perform by takes a lot of time (hours or day) to create. Use Google Takeout to take complete workspace data from your Google account. But, Google doesn’t offer any possible solution to help its user to backup their data into Google Workspace account. Restore can only be done with the help of a third-party solution.
Best Method to Backup & Restore Cloud Data
The automated Cloud Backup & Restore tool is the best way using which a user takes backup of cloud data of Microsoft 365 and Google Workspace platforms. This automated tool can backup and restore emails, contacts, calendars and documents with email attachments.
Steps to Backup Cloud Data:
1. Install the automated tool on your system & Activate it.
2. Click on the Backup tab and from backup configuration, select Source platform.
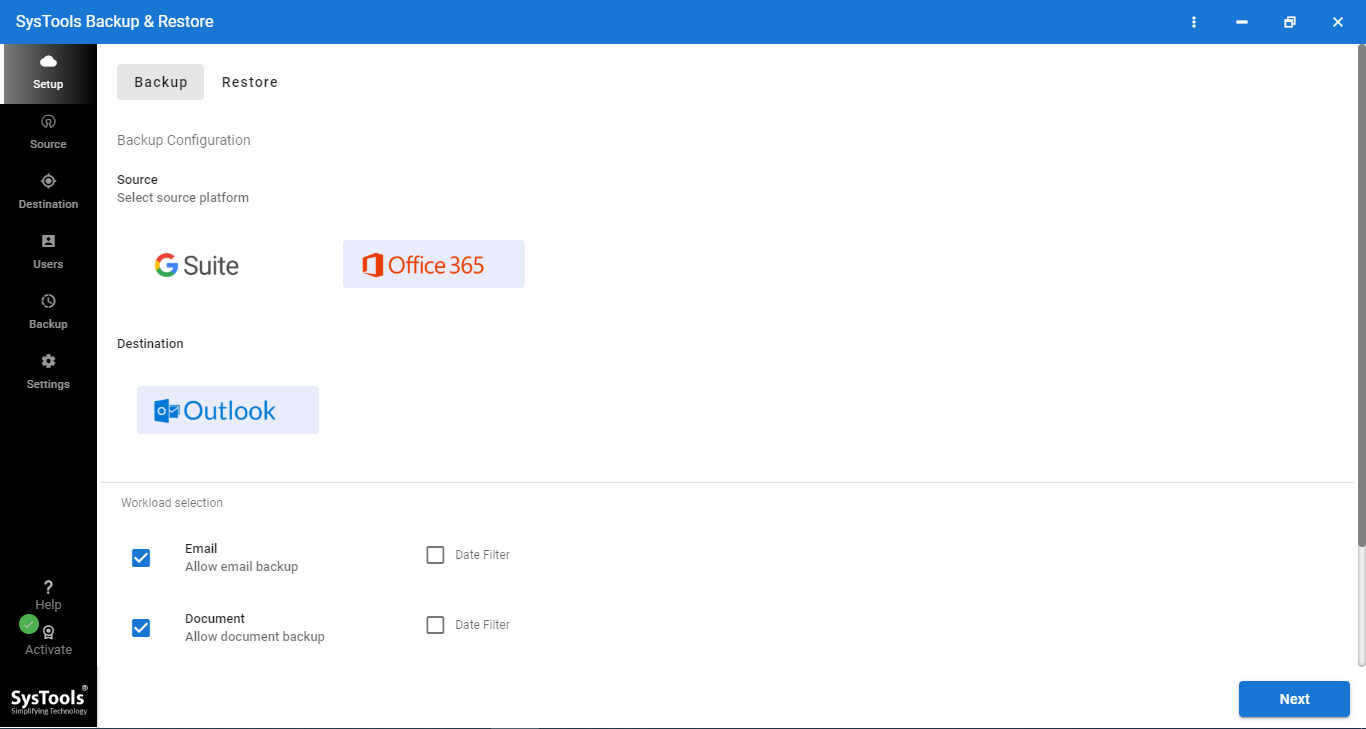
3. Go to the Workload section to select the category of items to backup
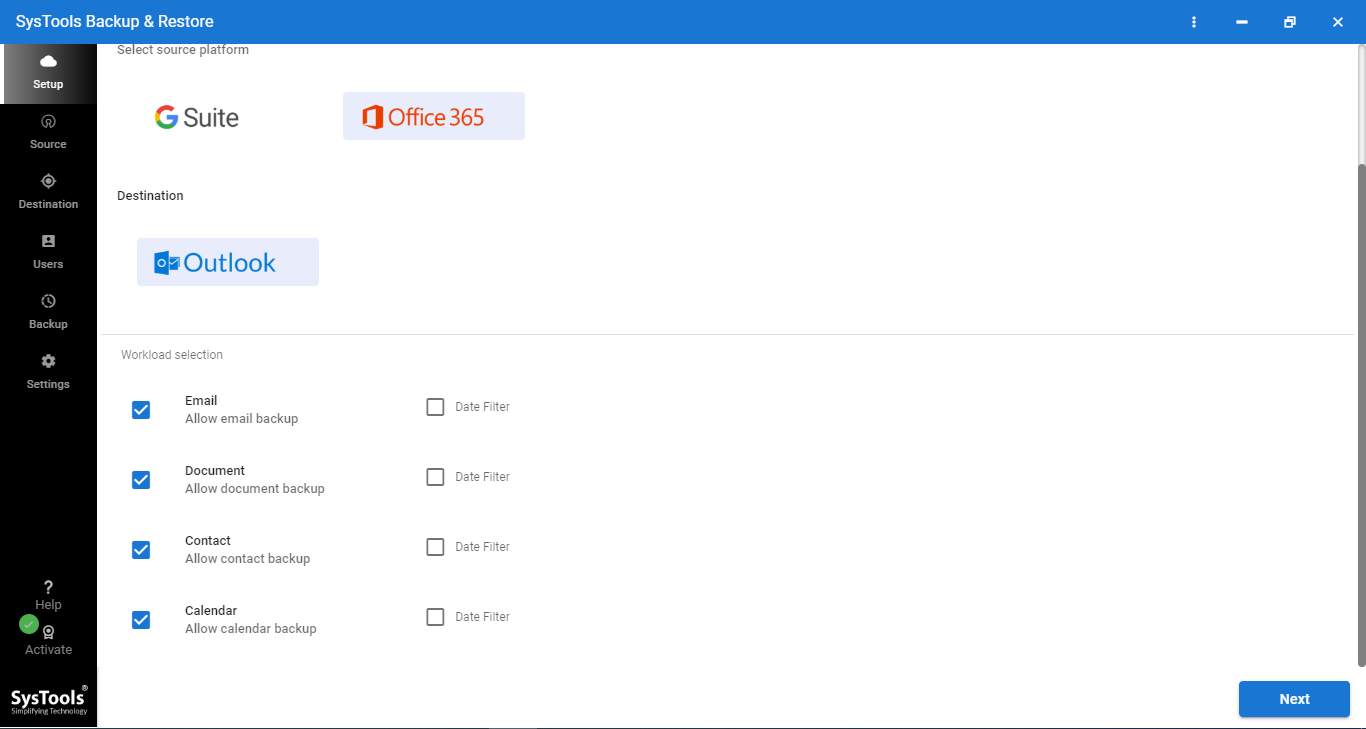
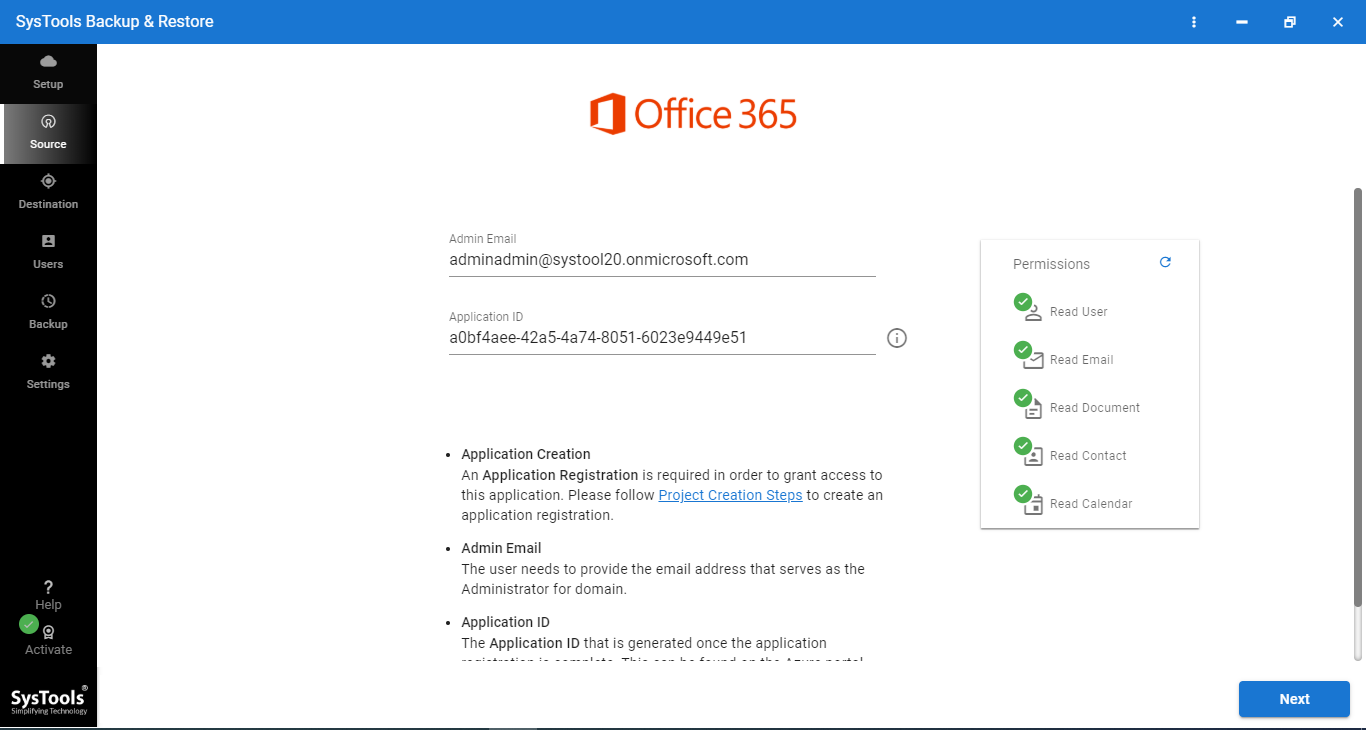
4. Go to the Source tab and provide the cloud admin id and application id
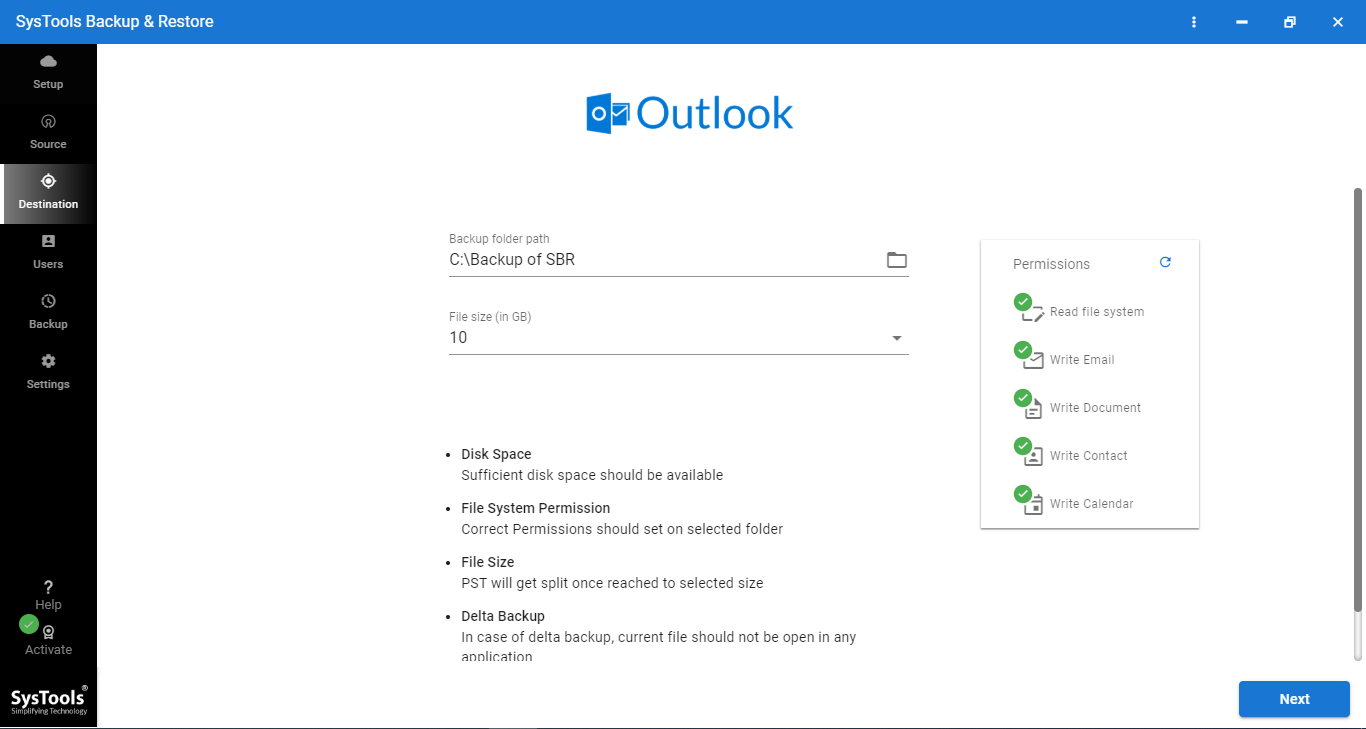
5. Go to the Destination tab and select the location save the backup
6. From the User tab, select the option for source and destination user id mapping
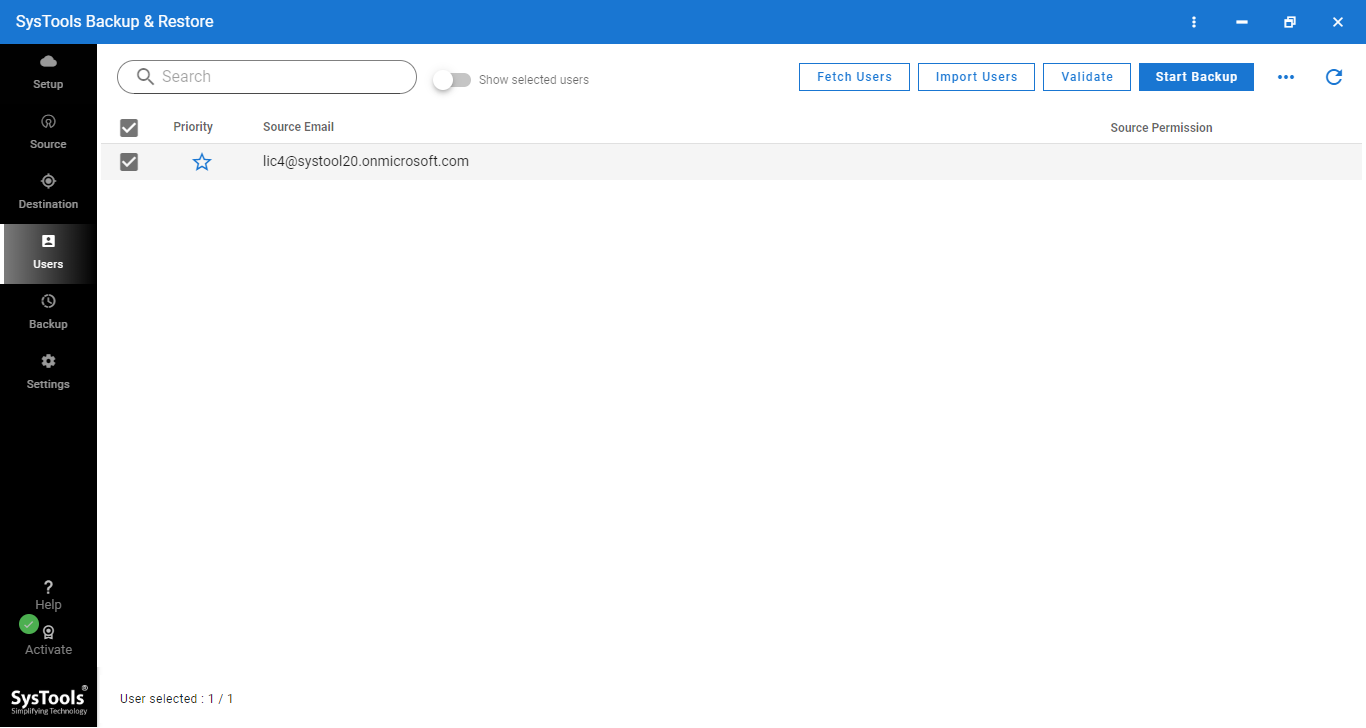
7. Authenticate user id and click on Start backup.
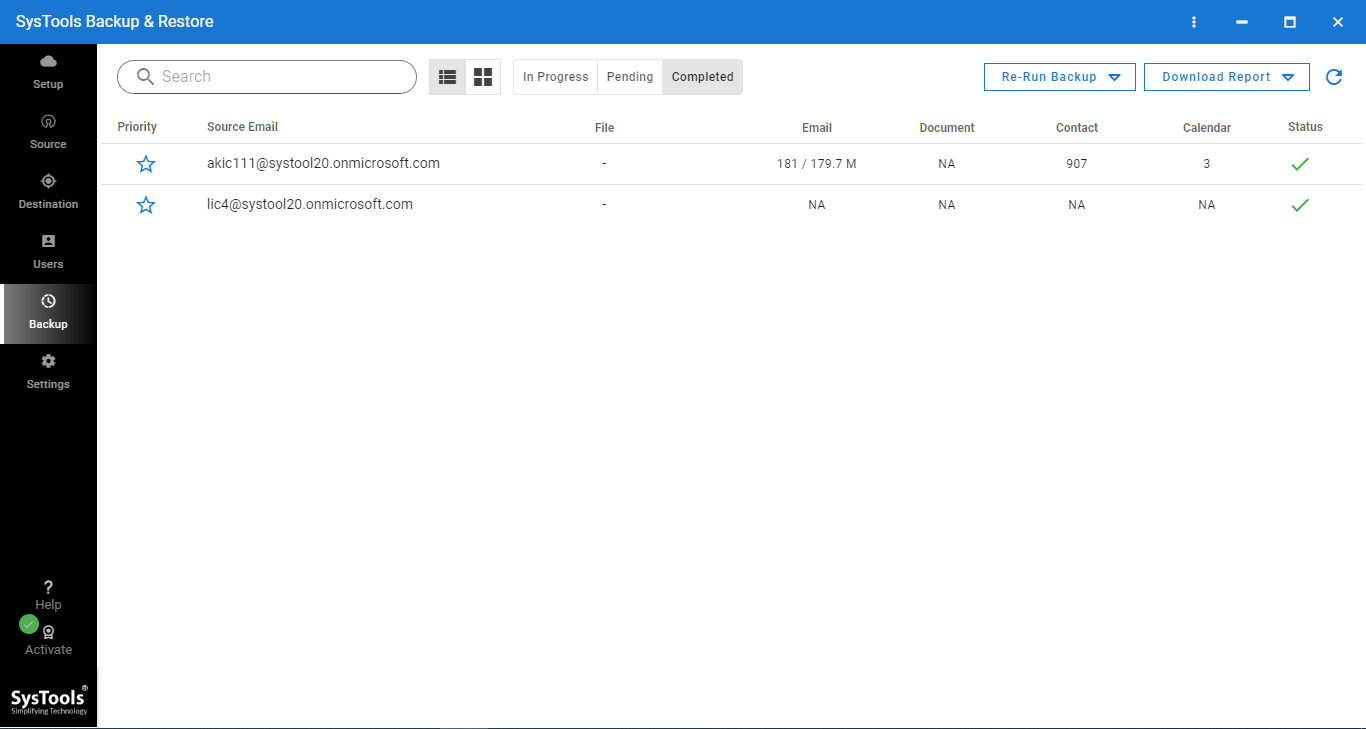
Steps to Restore Data to Cloud:
1. Install and activate the automated tool on your system
2. Click on the Restore tab and select the destination cloud platform

3. From the workload section, select the category of items to restore

4. Go to the source tab and select the location where the backup is stored.
5. In destination tab, provide the admin id and project details & validate.

6. Go to User tab to select the option for user & mailbox mapping

7. Authenticate user account and click on Restore button.
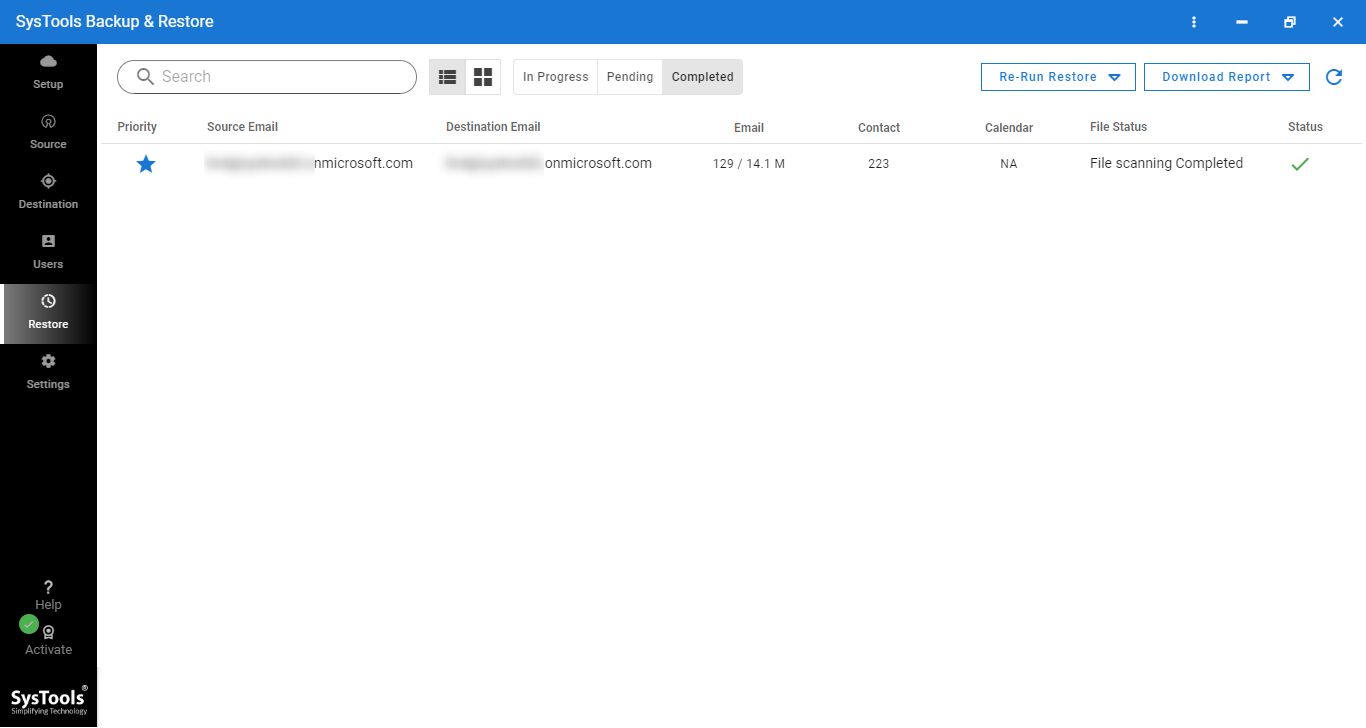
That’s it! In just 7 steps each, the admin can take backup of single or multiple cloud user accounts.
List of detailed features of automated cloud backup and restore tool:
1. Backup & Restores Complete data: Using the automated tool a user can take backup & restore workloads such as emails, contacts, calendars, and documents. The tool doesn’t impose any file size restriction while taking backup or restoring it into the cloud.
2. Supports Multiple Cloud Platforms: This automated tool provides backup & restore functionality for popular email clients such as Microsoft 365 (Office 365) and Google Workspace (G Suite).
3. Category and Date Filter: At the time of both backup and restore, the tool offers category and date filter options to work on selective data. The category filter allows performing an operation on the selected category that are Email, Contact, Calendar, and Document. And for each category option, the tool also offers a date-range filter to backup or restore particular date-range data.
4. Quick & Easy User Mapping: The tool offers to fetch and import Users options to get the user id:
- Fetch User: This option automatically fetches the user account in case of backup mode. The fetched user accounts will be listed in the tool window.
- Import Users: This option allows to import of a .csv file containing the list of user accounts.
5. Backup & Restore Report: After the completion of backup & restore process, the tool generates a report that contains the list of items backed up or restored. The tool generates two kinds of reports: summary and detailed report.
Conclusion
In this article, we have discussed some of the best techniques to backup & restore data cloud data. Here, we have focused on the solution of business cloud platform such as Microsoft 365 and Google Workspace. Although there are manual methods available to backup or restore the data, they are not reliable for a safe and secure process. That’s why we have demonstrated the best utility take can perform the task with ease and securely.

