Remove Exchange 1018 JET_errReadVerifyFailure Error – A Step by Step Guide


Exchange Error 1018 has now become one of the major concerns for users who access their database on this platform. Most of the administrator of Exchange to wants to know a quick solution to fix this error. However, it is not as easy as it seems to be. Finding a solution is not a big task, but finding a relevant solution is quite challenging.
Keeping this in mind, we have come up with some resolutions to rectify this Exchange 2007, 2010, 2013 error 1018. Nevertheless, directly jumping on to the solution part, it is important to know the some crucial information related to this error.
Overview of 1018 JET_errReadVerifyFailure Error
Generally, the Exchange error 1018 occurs due to the corruption in the database. This happens on page level. To determine the reasons and perform the fixing of any damage, users can use the built-in utility.
In case, EDB file is damaged or unhealthy at the page level, then Exchange generally displays the 1018 JET_errReadVerifyFailure error. It can be showed probably while creating online backup.
There are different levels of corruption occur in Exchange database. Depending upon what went wrong, this corruption happen. There are several reasons behind this Exchange database error. Let us discuss the reasons in the next section and then, we will move to the solution.
Causes behind Exchange Error 1018 JET_errReadVerifyFailure
The error 1018 in Exchange actually occurs due to these following factors:
- The value of checksum, which is saved in the header of database, differs from the checksum value, which is calculated during writing the database to disk.
- The error associated with NTFS file system may also lead to this error.
- Sometimes writing the data into a wrong place on hard disk is also becomes one of the responsible factors of Exchange error.
The Microsoft Exchange Server acts suspicious and creates this error. This happens at the time server produces an inappropriate value of checksum for page.
Strategy to Fix Exchange 2007, 2010, 2013 Error 1018
Just like any other error, the solution of this issue is also possible. However, for fixing the problem in a proper manner, it is very important to know the root causes behind the issue.
Along with this, it is important to have a proper guidance while performing the rectification of the error. There are two ways, which can rectify the error code 1018 in Exchange. One way is by using manual solution and the other method is by opting for a third party tool.
Method 1: Manual Solution
- With ESEUTIL
You can go for Eseutil/p switch, which is considered to be as the best method to fix the file-system-level corruption. In case, damage data prevails in the EDB file then it may result in loss of data.
Once you run this command, it will start the procedure of removing the corruption in EDB files. However, it is not possible to mount the Exchange Server to the database until the defragmentation of this is not done.

- Defragmenting Database
As soon as the damaged pages of EDB files are eliminated, then there are some white spaces, which are left behind. For the removal of this, you can defragment the database with the help of this syntax:
C:\program files\exchsevr\bin>Eseutil/d “c:\program files\exchsrvr\mdbdata\priv1.edb”
Exact B-Tree Structure
An index of the database is not maintained in a proper way when the repairing and defragmenting process take place. Hence, it can be corrected by using Isinteg tool. With this, it is possible to correct the logical and physical numbering of database. Once this s done, it makes easy to mount on server.
Method 2: Dependable Solution
In case the manual trick does not work, users can opt for third party tool and fix Exchange error 1018 in 2013, 2010 and 2007 versions of it. The name of the software is Exchange Server Recovery Software which is designed for the recovery of corrupted/damaged EDB files.


It comes up with various features that help in the recovery of EDB files in a fast and accurate manner. Moreover, the software is supported by every version of Windows Operating System with no trouble.
Quick and Advance scan removes corruption from Microsoft offline/dismounted Exchange EDB file. To repair & recover minimal corrupted EDB file click on quick scan and if the Exchange database file is highly corrupted then select advance scan. This option also recovers hard deleted Exchange mailboxes and items from loaded .edb file.
The software supports Exchange public and private EDB file. It export multiple and selective Exchange database mailboxes: legacy, shared, user, archive, disconnected and data items – calendars, notes, mails, tasks, calendars, contacts to Live Exchange Server, Office 365, and various other file formats.
This utility automatically creates an export report which stores the success and fail count of Exchange Exchange data such as: EDB to Outlook PST, EML, HTML, PDF, MBOX, HTML, MSG file format or any other export option.
Key Features Of Professional Software
- Recover severely damaged Exchange database file
- Preview recovered MS Exchange item before conversion
- Extract mailboxes from offline / dismounted EDB file
- Preserve on-disk folder structure and keep metadata intact
- Extract Exchange EDB to PST Outlook without losing any data
- Remove (SMIME/OpenPGP) encryption option from Exchange mailboxes in bulk
- Convert selectively Exchange mailbox data using date and category option
- Support all version of Windows OS, Exchange Server, and MS Outlook
Steps to Recover Corrupted/Damaged Exchange Database File
Step 1: Download > Install the automated Wizard, and Launch it
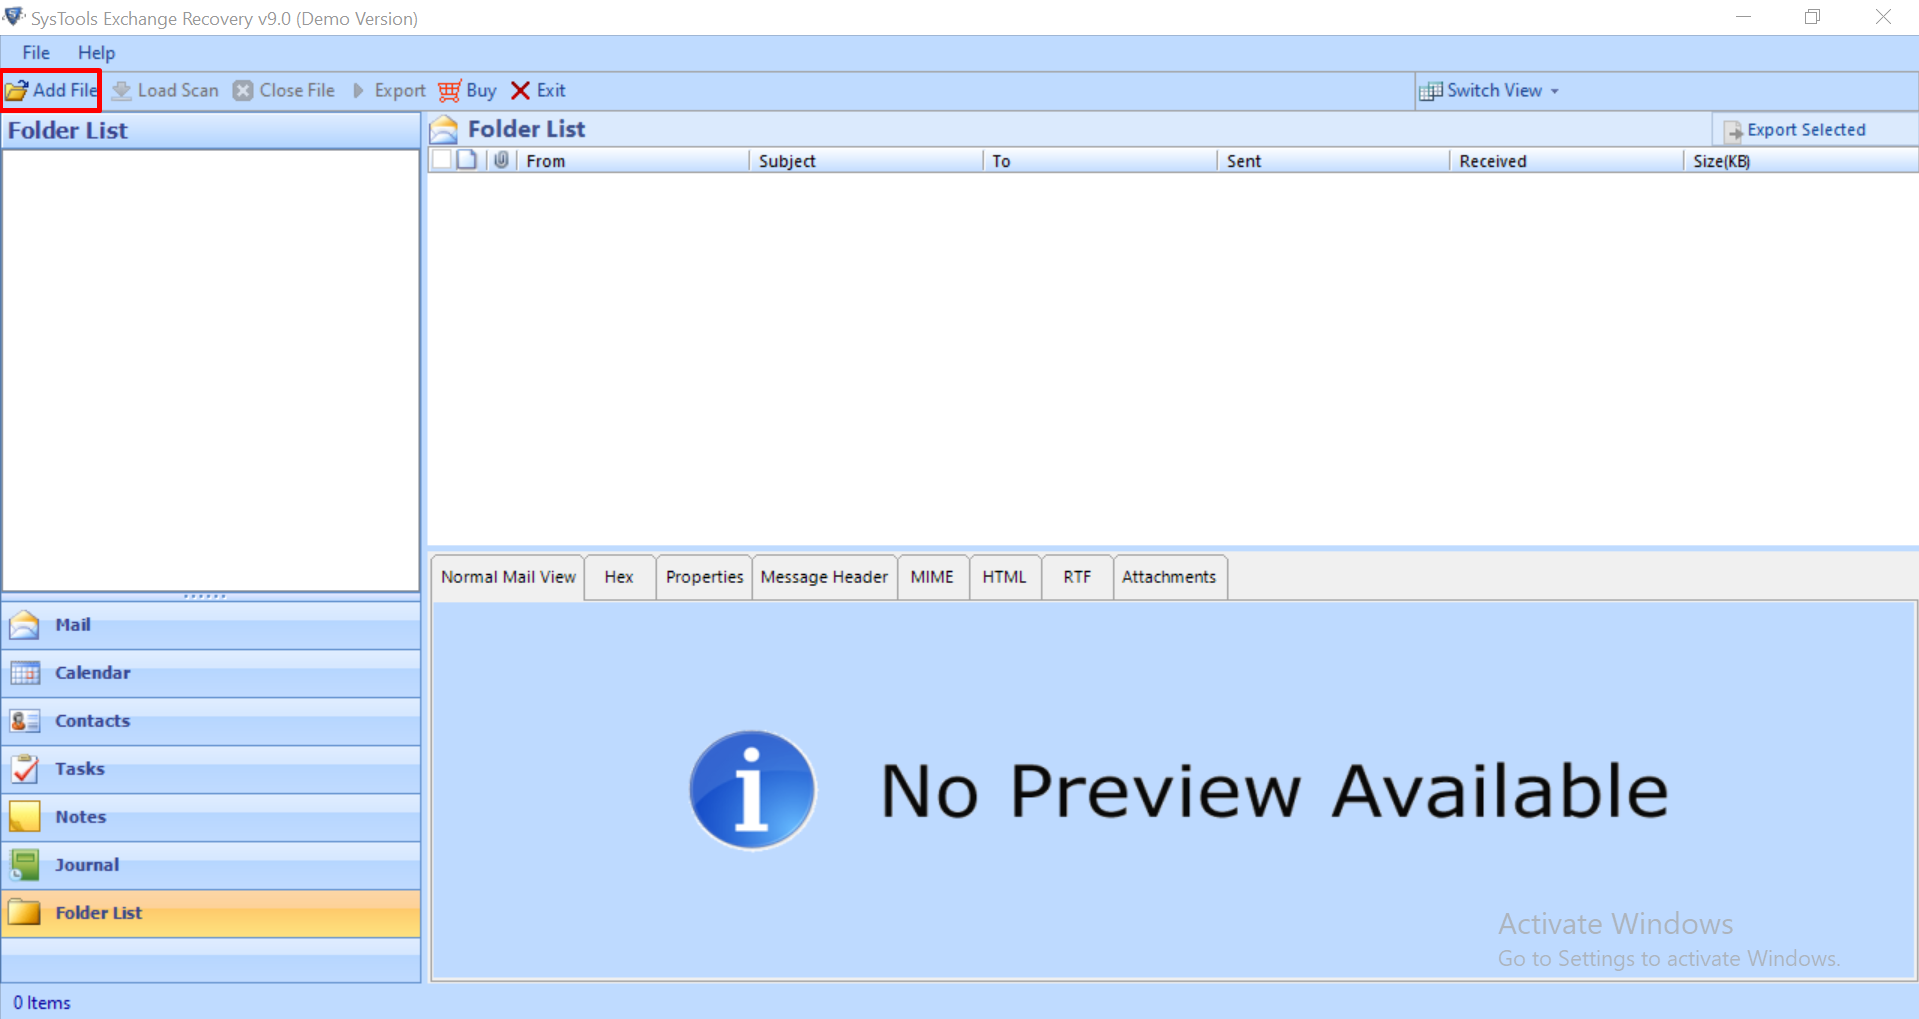
Step 2: Click Add File > Load offline Exchange .edb file
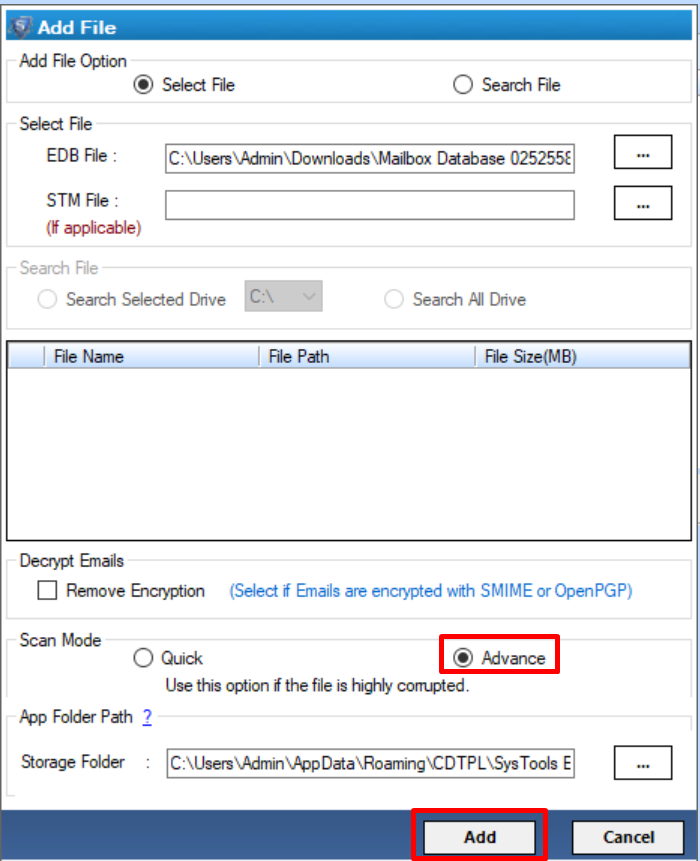
Step 3: Select Advance scan > Click on Add button
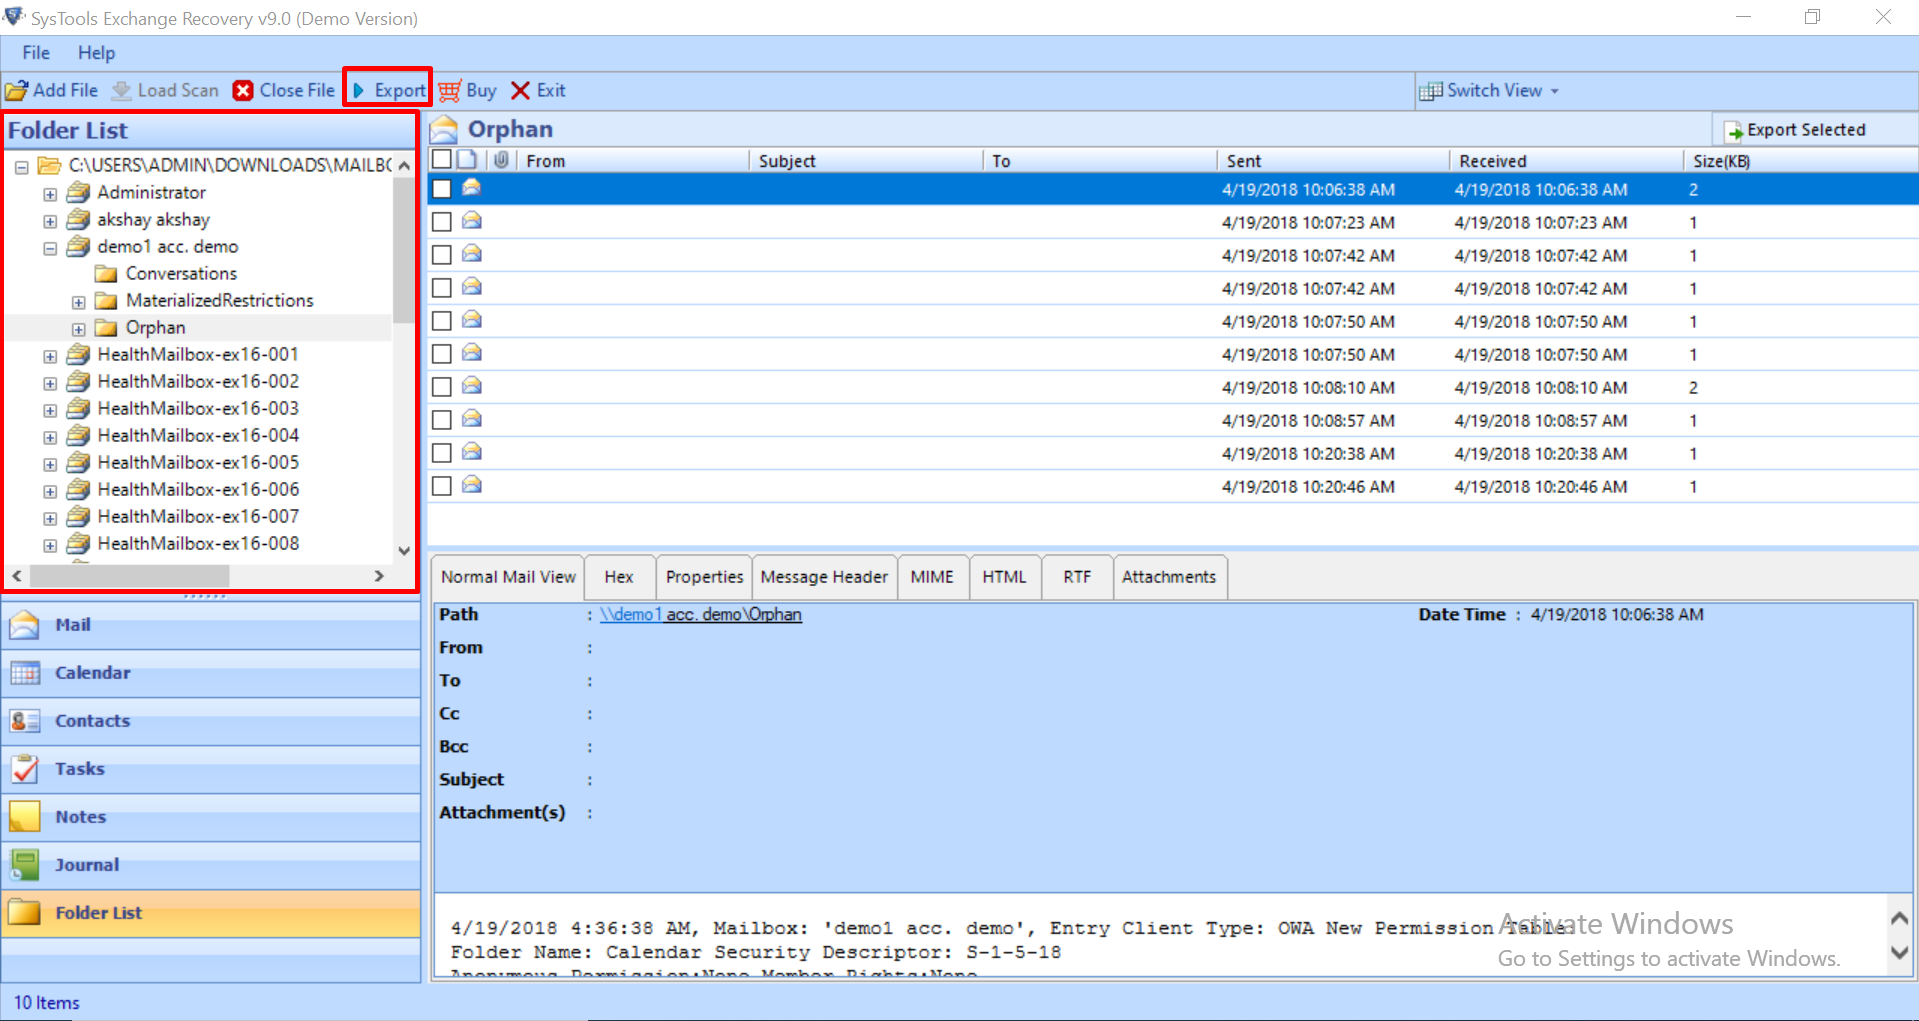
Step 4: Preview recovered as well as healthy Exchange database file > Click Export
Step 5: Click on Exchange mailboxes > Select the export option > Click on browse button to set target file path > Click on the export button

Wrapping It Up
Microsoft Exchange is one of the major platforms that are used to maintain the business continuity. However, some errors creates hurdle in between of the work and affects the productivity of the business. Exchange error 1018 JET_errReadVerifyFailure is one such common error. Once encounter the error users want to find the solution as soon as possible, but it is not easy. Considering this, we have come up with the manual as well as alternative approach to fix this error. It is recommended to use a third party product for a quick and guaranteed result that is given above.