Migrate Outlook Emails to Office 365 Mailbox: A Stepwise Guide
In this article, we are going to demonstrate multiple methods to migrate Outlook emails to Office 365. Here, we will also discuss why Outlook users should choose Office 365 over any other webmail client.
Why Should You Choose Office 365?
A renowned cloud-based software offered by Microsoft is Office 365 suite which is an expert in providing a business environment.
The foremost reason for using Office 365 suite in any business organization is its ability to provide multiple services in a safe and secure environment. Moreover, Office 365 is the web version of MS Outlook with new feature, so it become easy for user to adapt to its feature and interface.
How to Migrate Outlook Emails to Office 365?
One way of doing this is by using the IMAP synchronization technique. And the other is by using an automated tool.
- Manually Migrate data – Single User At a Time
- Easily Migrate From Outlook to O365 – For Multiple User
How to Export Outlook Data Into PST Format?
Use the Import/Export Wizard offered by Microsoft Outlook to export files.
Step 1. Click on the Open & Export option from the File menu. Then select the Import/Export option.

Step 2. An Import/Export wizard will appear on the screen in which you have to select Export to a file option followed by Next button.

Step 3. Now click on Outlook Data file (.pst) followed by Next button.

Step 4. In this window, you must select a profile then, click Next.

Step 5. Enable the Replace Duplicates with items exported, and click the Finish button.

Method #1: Manually Migrate Exported Data into Office 365
At the end of this step, you will have your Outlook data in the form of a PST file which is also locally stored on your machine. Now you can upload it into your Office 365 account.
The manual method makes it quite complicated for some users, especially for those who have a non-technical background.
So, it is not usually preferred unless you are confident enough to use this technique.
Instead, it is preferred to use one of the direct approaches for Outlook to Office 365 migration which is not arduous at all. This can be achieved by following the given two steps in the same order.
Let’s discuss an easier way to migrate Outlook to Office 365.
Method #2: Directly Migrate Data from Outlook to Office 365
The above section explains the steps to export data from Outlook and then import it into Office 365. That, too can be done for a single user at a time.
But if you want to perform this operation for multiple users, then you just must follow the below-mentioned solution.
The users can also transfer the data using the manual procedure, but that process requires a lot of time and effort.
Thus, we have mentioned the software so that users can complete the entire process without any issues.
Note: If you already have PST file stored in your system then you just must follow the below mentioned steps.
To directly migrate Outlook emails, calendars, and contacts to Office 365, use the PST to Office 365 import tool.
This tool makes the entire process efficient and effortless as it helps to convert entire mailbox data including emails, calendars, contacts, tasks, etc.
Simple Steps to Perform Outlook to Office 365 Migration
Step 1. Choose Outlook and Office 365 as the source and destination platforms.

Step 2. From the workload selection area, choose the mailbox categories such as email contacts, calendar, etc to migrate and set the date filter option. Then proceed by clicking “Next.”

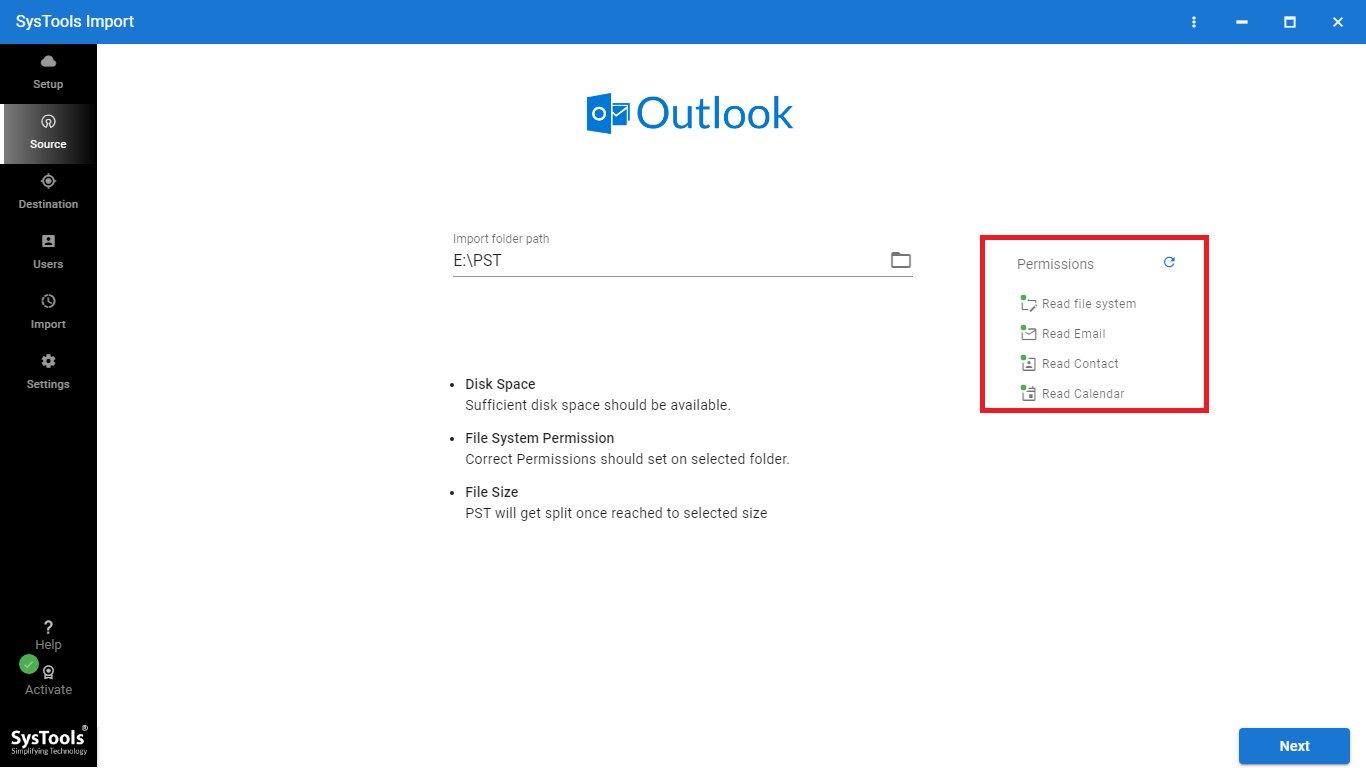
Step 3. In the source tab, set the path where the Outlook PST files are stored. Arrange them in folders named after their respective O365 email IDs, as follows:
Create a root folder, such as E:/PST/user1@domainName.com/ (consolidate all of user1’s PST files here).
- E:/PST/user2@domainName.com/ (aggregate all of user2’s PST files here).
- E:/PST/user3@domainName.com/ (assemble all of user3’s PST files here).
- Continue this pattern…
Subsequently, designate the folder “E:/PST/” as the Import Folder Path in our tool.

Step 4. Click on the validate button, permissions will be granted to the source platform. Proceed by clicking “Next.”
Step 5. Enter the Office 365 admin email ID and the application ID for the destination. Click “Confirm” to validate the credentials. After successful validation, permissions will be granted to the admin account. Click “Next.”

Step 6. When it comes to the Users screen, you have multiple options for adding users from the source account that require processing:
- Fetch Users – Automatically retrieves users from the Source.
- Import CSV – Imports users via CSV.
- Download a template – Generates a CSV file.
Select the method that aligns with your requirements.
Step 7. The list of source users is displayed on the screen. You can search for a specific mailbox and select the user for data migration. Utilize the “Show Selected” toggle switch to display only the chosen users, streamlining the selective data migration process.
Step 8. At this point, you need to include destination user accounts. You have two alternatives for accomplishing this:
- Make use of the User List Template, which offers a sample CSV file for manually adding source users.
- Migrate users via CSV.
Step 9. Click “validate” to authorize the selected user source and destination accounts. Once validation is successful, click the “OK” button.
Step 10. Finally, press the “Initiate Migration” button to commence the migration process.

Conclusion
Users who are using Microsoft Outlook and want to move their data to an Office 365 account usually have queries like how to migrate Outlook emails to Office 365 along with contacts and calendars.
There is manual as well as automated method to export mailbox data but there are some limitations in the manual process. Therefore, in this article, we have explained a simple and quick solution to perform Outlook to Office 365 migration.

